Saturday, July 26, 2008

Cricut Car Decal

Okay here are the pictures!! The overall measurements for the head are approx 4 in x 4.25 in.

This one is with the black shadow. The plastic film over the decal is the release tape. All decals will have release tape to make application easier. I will include instructions with each decal. Also if you have words you want they will also be in release tape. I was orignially going to weld the words to the head but thought some folks might want them to the side or on top or bottom. With the release tape you can put the words where you like so it gives you some freedom with that.


This picture is the plain version. Of course it will have release tape also, just didn't include it in this picture. Tried to get a clear shot. Wish the pictures were a little better but my camera is acting up on me!


Now for ordering information.
  • If you want to order a decal please email me, in the subject line it is very important that you put CRICUT DECAL ORDER so I know that is what the email is for and it doesn't get lost.
  • In the order email please specify which decal you are wanting. If you are wanting words please specify the words. Also I can do "I heart my Cricut" *a heart emblem, not sure how to post it here like that...HA HA HA* with a red heart if you wish. This will also be $9.00.
  • Specify if you want your words shadowed or not.
  • Wording will be on release tape also but will be separate from the decal so you can place the words where ever you like.

Prices are as follows and include shipping and handling. International orders will need to add $1.00 to the total price:
Decal plain $7.00
Decal with shadow $7.50
Decal with words of your choice $9.00

PAYPAL INFORMATION - if you are paying with Paypal please do NOT send payment until I send you an invoice for your decal. Also make sure to include your Paypal id so I can send the invoice to the correct place. I will not cut your decal or ship until your payment is clear.

MONEY ORDER INFORMATION - If you are paying by money order I will email you a form for you to print and fill out to mail to me with the money order. Once your order is received I will cut and ship your decal.

Okay think that is all.......if I think of more I will let ya'll know!! *HA HA HA HA*

Wednesday, July 16, 2008

Cricut head for the car

PennyG pm'd me on the MB because she was having problems with making a cricut head. She was wanting to make one for her car. So I was able to make a Cricut Head with George that was big enough for what she was wanting.

The mats are labeled for you. On the mouth part I have some cuts going across the mouth to where it will have it the right size and shape, just use the part in the middle of the C cut and toss the rest in the trash.

Thanks for allowing me to post the picture Penny!! Sorry that your husband wont' drive your car anymore! HA HA HA

Sunday, July 13, 2008

Cupcake Cards, Christmas card.....and even an ugly card!

Well I got my Prisma pencils from Plumeriastix yesterday so today I had to try them! I did 3 cupcake cards. The two with the blue mat paper are from a challenge that LGuild gave me. She brought me some "ugly paper" as she called it and told me "it's a challenge to see what you can do with it" LOL. I still have some more sheets she brought me that I need to do something with. The cupcake stamp is a Inkadinkadoo set. The scalloped circle are some that I made on DS.


Next I did a Christmas card as part of a Christmas in July Challenge on the Cricut MB. I saw a Suspension card on Splitcoaststampers and thought I would give it a shot. Since I don't have circle punches I just made my pattern on DS. I used the cuttlebug embossing folder snowflake and Paisley, which I received yesterday from MelissaMissesTX! THANK YOU SO MUCH!

Okay more detail ...
The card base is barn red card stock I got at Big Lots, I don't know the name brand. I inked with white Colorbox Cat Eye ink.

The large mat is a paisley sheet from My Mind's Eye Magnolia pack.

The middle mats are DCWV pink, sanded and inked with Color box cat eye ink, fuschia.

I used DCWV light blue card stock and sanded after embossing with the snowflake folder for the small mats and inked with Color box cat eye ink terracotta.

I used Christmas Cheer for the snowman. I cuttle bugged his scarf with the Paisley folder and used black scribblers for his eyes, mouth and buttons and orange for his carrot nose. I also inked around the bottom of the snowman with Colorbox Cat Eye ink gray.

The sentiment stamp is a Studio G and the snowflake stamp is from the Inkadinkadoo Warm Wishes holiday set.

The snowflakes are a Paper Studio punch and I used a glitter pen on them.

For suspending the circle I used dental floss.


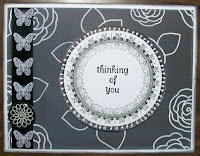
Lastly I did a black and white card, which I am just not loving!! I wanted to try out the ribbon and stickers that I won on DCscrappers blog. But I just did not do the ribbon and stickers justice! *tear rolls down okie's cheek*. I will try better next time Lillie! I PROMISE!

Thursday, July 10, 2008

And the winner is.......

I would like to thank all that entered my blog challenge! Everyone did such a great job and were so creative with their ideas!

The judges had a rough time choosing one card! It came down to two finalists and I had to call in some reserve judges to then choose a winner from the finalists. The card that won was chosen on the creativity fo adding the picture! The judges all liked the idea of seeing people in the window. One commented that they felt like they wanted to be there with the people.

So congrats MaryNSC!! You are the winner of the Planter Box Window Card challenge!

Mary gave the following information on how she made her card:
The Cricut (baby bug)
CDS
Old Faithful George cart
DCWV The Summer Cardstock Stack White and blue
Pop dots
Purple Cow Cutter
Mini Scor It
Clear Plastic for the Window
Mini Square Punch
Mini Flower
Mini Dragon fly
Colorbox Chestnut
Colorbox French Blue
Ribbon for the curtain


Two cards I did this evening

Early for Thanksgiving I know, but, I love this little pumpkin stamp! I used the color pencil OMS method for the coloring. I used Rose Art pencils but I think Prisma's would be so much better! I used a Studio G for the Happy Thanksgiving and leaves. I made the Scallop square with DS. I used my purple cow trimmer for the edging on the mat paper.


This is a card I made using a SEE D's stamp set, one of the $1 sets. I embossed the frosting area and the candle. Used Stickles for the flame. I used some mulberry paper to fold up for the cupcake paper. I made the scalloped rectangle with DS. I used my purple cow trimmer for the decorative cut on the mat paper. I used the MM tag maker for the tag and the YUMMY BIRTHDAY was part of the See D stamp set.

Wednesday, July 9, 2008

Chili Pepper

I was cruisin through the MB section of DS last night and someone wondered if a CHILI PEPPER had been made. I was able to make one fairly quickly. The actual cut file does look a little better than this screenshot. I did some work on the stem cap so it isn't as angular and has a bit more curve.

I should be scrapping like crazy.....

BUT I'M NOT! Instead I am scratching like crazy! This is my third day off work due to poison ivy. I think I am going to have to give in and go get the shot. I thought I could beat it on my own this time but it just isn't working out that way. I tried working on some LO's and even tried to do some cards but I can't get those creative juices going when my hands keep going from my knees to my ankles to my shins to scratch.

So guess for right now my favorite hobby is scratchin instead of scrappin........

Tuesday, July 8, 2008

Dessert Recipe Swap

I received my dessert recipe LO's yesterday and man are there some beautiful ones!! I am not sure if all of the LO's will be posted on the MB or not. But thought I would post mine here!

So after I got them all done I noticed I made a mistake! It was suppose to be Pig Pickin Cake.......This teaches me not to be on the phone while I am assembling LO's! HA HA HA

I used Printing Press for the letters. I used a flower from WIMG *I think*. I made the PIG HEAD from George and inked around the edges with some cat eye ink. I used a little prima flower with some Stickles *of course I had to use Stickles!!* for the center.

I cut yellow card stock to 4x6 inches and printed the recipe on those. Just hand doodled around the edges of the recipe card.

Even with the mistake I still like the LO!

Challenge is over!

I got several entries for my blog challenge and I am so excited! I have the entries sent to my four judges and hopefully I will be announcing a winner by Friday!! Good luck to those who entered!!

Thursday, July 3, 2008

AAHH 4th of July!!

I got a wonderful box of goodies yesterday from A.Go on the MB. Some of the things he sent were small chipboard albums, measuring about 3 1/2 inches or so. I have never done any of these so today I thought I would try it (mainly because all my swaps are done and I now have some time to do some things for my own collection LOL).

I really enjoyed making the little album. I got the rubons at a crop a few months back as part of a free give away. I do have some extras from the set if I need to do more embellishment after I add pictures. The patterned paper was some I got from ABC distributing YEARS ago. I used Bazzill card stock for the plain.

(You can click on the pictures to see more detail)

This is the cover. I did use some ribbon to tie the book closed. I also used my deckle blade that came with my purple cows trimmer for the decorative edges. I was using my big Zig glue pen but it ran out on me so I finshed up with a Scotch 2 way glue pen.


I tried to leave some big areas for pictures, but I still wanted some decorative pages also. I used some ink for the edges *okie so loves inked edges*. Again with the rub ons. There were actually quite a few on that little sheet!


I wasn't sure how the orange would look but I think it added some extra color to the little album and I do like the way it looks. All the patterned paper came in a set so I thought I might as well use it.


Of course there will be eating involved during the holiday of Freedom! So I was glad there were some rub ons to make a comment about that. I left an area above the rub on so I can add a picture also.


Since we are going to be out on the boat Saturday I thought I needed a page for that and luckily there were some rub ons that had to so with water too! *okie just notices there are NO STICKLES ON THIS PROJECT!!


Of course what is the 4th of July without fireworks?!. I had to do minimal decorations since the album is small. But I think the rub ons and paper helped tie the theme together well.


Okay so the back isn't quite done. But I am wanting to find a good picture of fireworks or something for the back and then maybe add a rub on or two. Since I need the picture first it looks a little plain.


I enjoyed doing this little project and can't wait to get some pictures to add to it!!