
For so long I thought I was limited to cutting the largest vinyl projects to a 12x24 cutting mat and there have been some things I would have liked to cut larger but never thought outside the box, which is odd for me since I think my brain tends to live outside the box most of the time. But I have now learned that I can cut things much larger and this is gonna be an EPIC change in things I do with vinyl!
A few weeks my friend Dave and his 12 year old son Tayden came over to visit and Tayden was a bit mesmerized by my craftroom. Tayden had a lot of questions and was rather intrigued about things I could cut. He asked if I could cut him a Ghostrider for his bedroom wall. I told him if he could find me a decent picture that I might be able to cut it for him. He sat on the computer looking at pictures for quite sometime and finally found one he liked. I looked at it nervously and told him "I can't promise I can get a clean trace and cut it but I'll try my best".

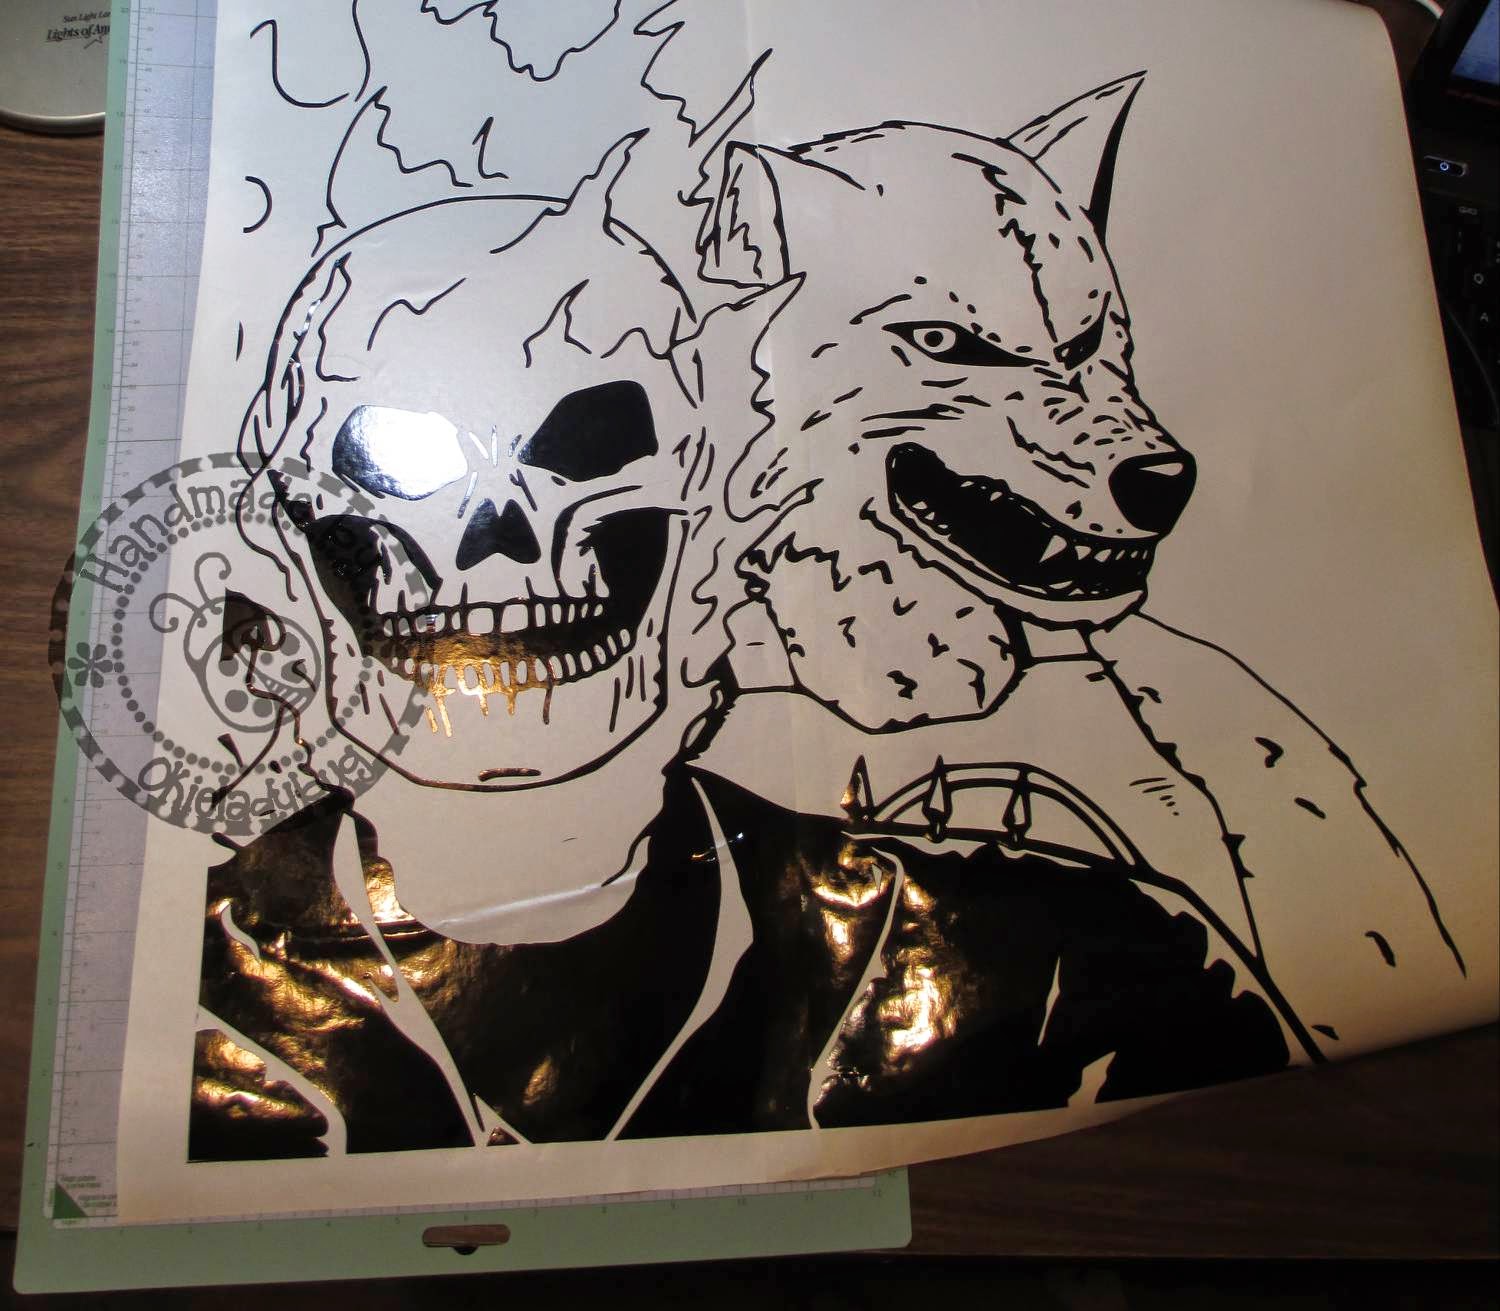
After several traces, cleaning up images, figuring out how to cut it bigger and then putting it to the test this was the end result.
The image is approximately 30" x 22", so almost 3 times as large as the largest vinyl project I have cut! When I thought about cutting this I knew I should probably document how I did it in case there were questions and I decided to go ahead and do a tutorial.
The tutorial is for Make The Cut only since I do not know how other programs work. Please don't ask me how to make it work in other programs because I will likely cuss you out *okie gets ready to give the evil eye to anyone who asks*. You have been warned!
WORD OF CAUTION: Continue to save your project throughout the process. I would have for people to go through all this and then lose the project because they didn't save periodically.
 First make your image as large as you can to work with while still seeing the full image on the screen.
Make two lines that are longer than the image and place them where you need them. Since I don't know how big of an image you want to cut I can't tell you specifics. Now copy both and paste on another mat, you will need this for line placement in a few steps down.
 Next do a "boolean" join and choose the option "B-A Difference" and hit apply. This will split the image into sections.
With the image selected, in other words the box should be around the image, click the "break" function as to break up all the image.
Now you should have all the grey boxes around the pieces of the image.
 Now take your mouse and box all of the middle image together and click "Join". The two outer parts of the image should still have all the little grey boxes around them.
Since my middle section was taller I was able to draw a box around the outer pieces without it effecting the section I just made. You may need to do each side individually depending on your project. Once you have the outer sides selected then click on "delete".

All that should be left on your mat at this point is the image that was in the middle that was "joined".

Copy your middle image and paste it to a NEW LAYER on the mat that you copy and pasted earlier. You should see something like this. I keep my layers in different colors so I can see them more easily.
 Break your lines you have joined so you can move them independently and line the OUTER edge of the line to edge of the middle image.
Next, "HIDE" your middle image. Select the long lines and join those lines. Then select both images that are showing on the mat and use the "BOOLEAN JOIN" function as explained in previous step.
 Do an image "Break" and get rid of the middle section. You can join the outer sections individually before or after you delete the middle image.
Now you should be able to faintly see the middle image from the hidden layer and you should have two outer images. If you haven't joined those individually then do so now.
 Make the hidden layer visible so you can see if your images are lined up correctly. If not then you screwed up somewhere or I didn't explain it right but I'm going with the you screwed up theory. And that is mainly for my friend Carmen because she tends to try and blame me when she is not listening and following what I am trying to tell her what to do.
Next zoom out so you have plenty of white space on your screen and the image and mat look small.

Select all images and rotate 90 degrees.
 Now resize your image to how big you want. I chose to go almost 24 inches on this one. Since I was using a Cricut cutting mat I had to be mindful of the margins since they don't fit perfectly in my Pazzles machine.
  You will now want to add each section to a "NEW LAYER" so you will be able to "HIDE" the layers you are not cutting at the time. See the "LAYERS" menu for example if needed.
Now this is just a little tip and not necessary for all images - My image had a lot of "nodes" so I chose to break each image and then join parts of each one and then adding to new layers as I went so when I got ready to cut my machine didn't freak out due to there being so many "nodes". If you do this just make sure you know exactly which main image you are cutting and don't cut the wrong one. If this frightens you then just copy and paste each image to a new mat and do it that way so it isn't as confusing.
Now you are ready for cutting. Right before cutting you may want to say a little prayer or have some wine to calm the nerves.
After cutting and weeding the images then you need to decide if you are going to just keep them separate or join them together for application. If you are doing this for someone to apply later then you might want to join the image before adding the transfer tape.
 I did join this image and to join I cut along the inner edges of the two outside images with scissors. On the back of the middle image I put tape and let it overhang the edge so when I laid the outside image down it would be taped together.
I did find it easier to keep the middle image on the cutting mat to join the long sheets together so I didn't have it moving around.

Here is a close up so you can see how the image matches up. Now it might not be absolutely perfect but it should be close enough.
Now just add your transfer tape and you are ready to go!
I certainly hope you guys enjoyed this tutorial and that someone uses it because it was a real pain the ass to take all the pictures, edit them, watermark them, upload them and then write all the steps out! *okie falls out chair laughing*
It is so special of you to share all your ideas. I think you need an Explore. We Cricut gals miss you! (Noooo-I didn't ask, so you do not need to cuss me out or give me the Evil eye!!!) LOL Love your work. You are so talented!
ReplyDeleteDefinitely outside the box! Glad you shared this tutorial for those who want to tackle larger projects. Do you have this in SVG format? ROFLMAO!
ReplyDeleteHoly cow! I don't even understand half of what you did but I am very impressed, to say the least. And appreciate your documenting it all for us, too. Awesome! Your "virgin" piece turned out fabulous.
ReplyDeleteHi Okie! Looks great! Try the tiler in MTC; it will do most of the work for you. Ginger
ReplyDelete